Craft patterns and projects

A place for ideas to grow!

Fall 2014 Projects

So it feels like it has been forever since I’ve blogged. Life has been super hectic this fall, but I’ve been able to get a bit of work done.

I saw a decorated canvas necklace holder on pinterest (see link here), and thought it would be pretty cool to paint one. It was super easy and didn’t take a whole lot of time to do. Then I screwed in hooks from Walmart. I found larger ones for the second one so I could use it for head bands.

.canvasnecklace hangerheadband holder

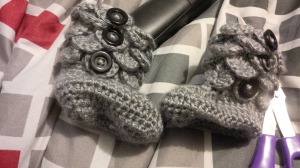
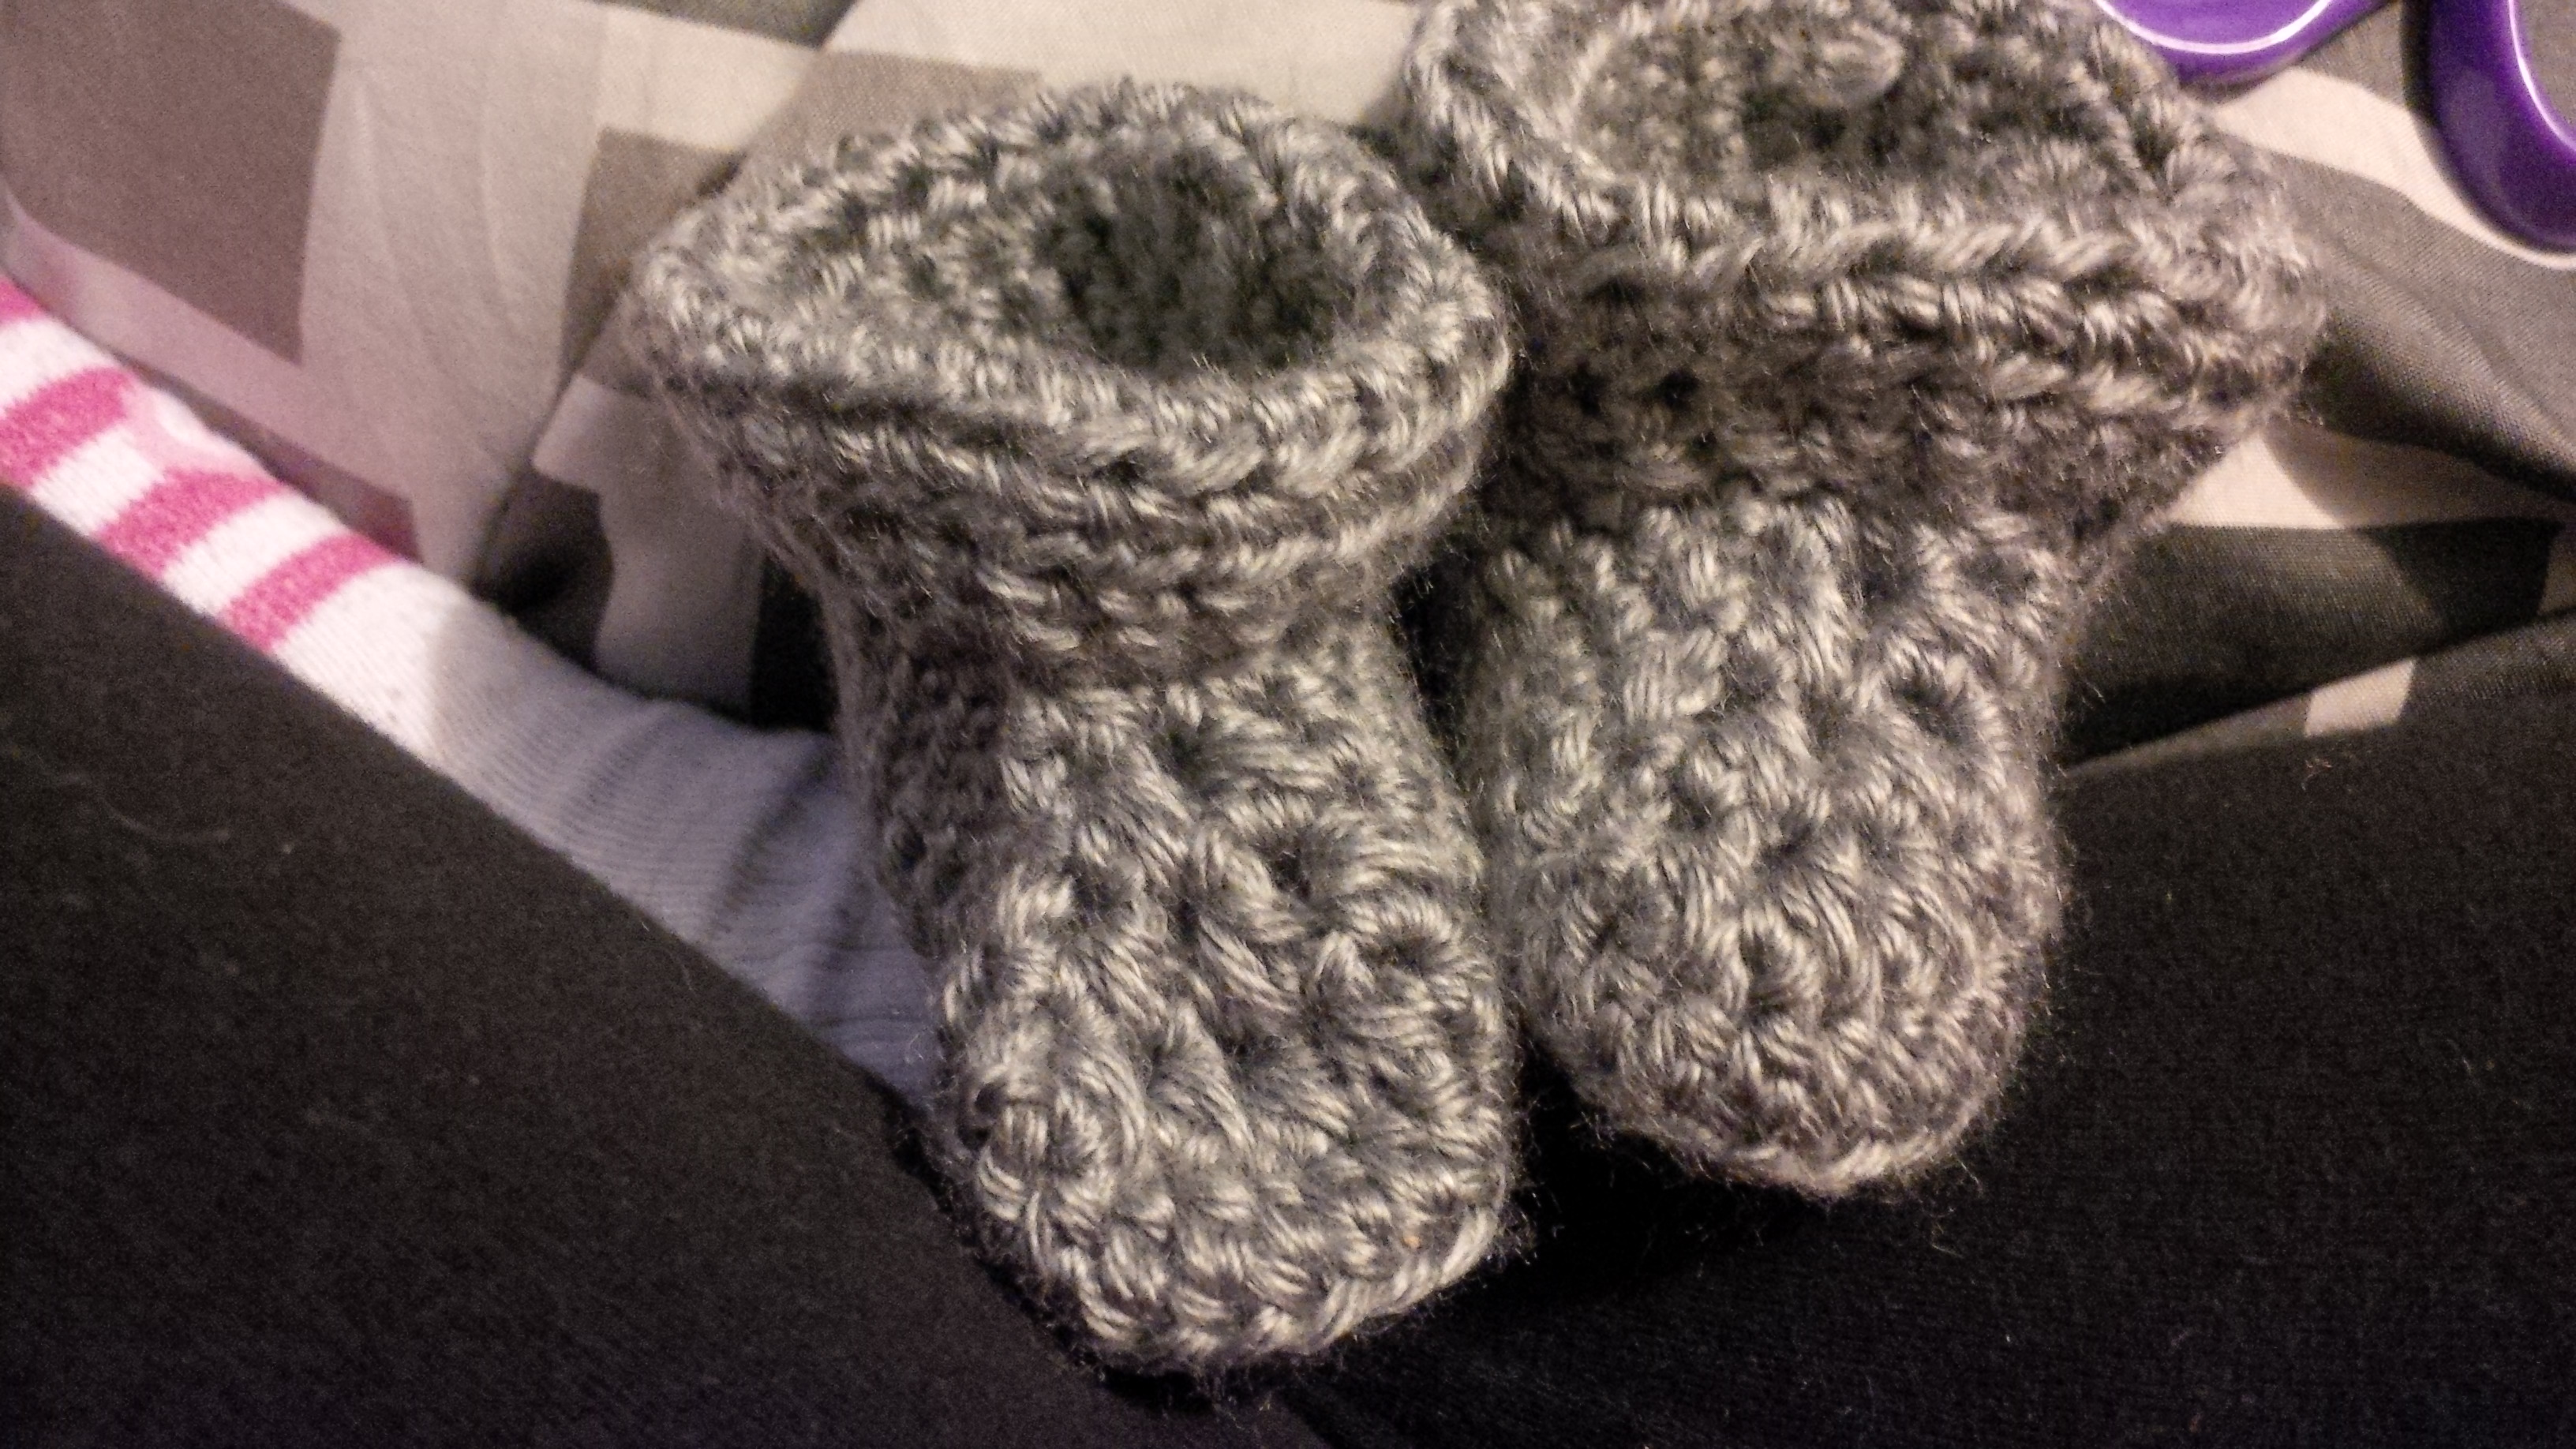
My sister-in-law had asked me to make the crocodile booties (found here) for my future nephew. The second set of booties were my first attempt, but I couldn’t figure out the stitch, so they became folded booties. A good crocodile stitch pattern is available here.

crocodile booties folded booties

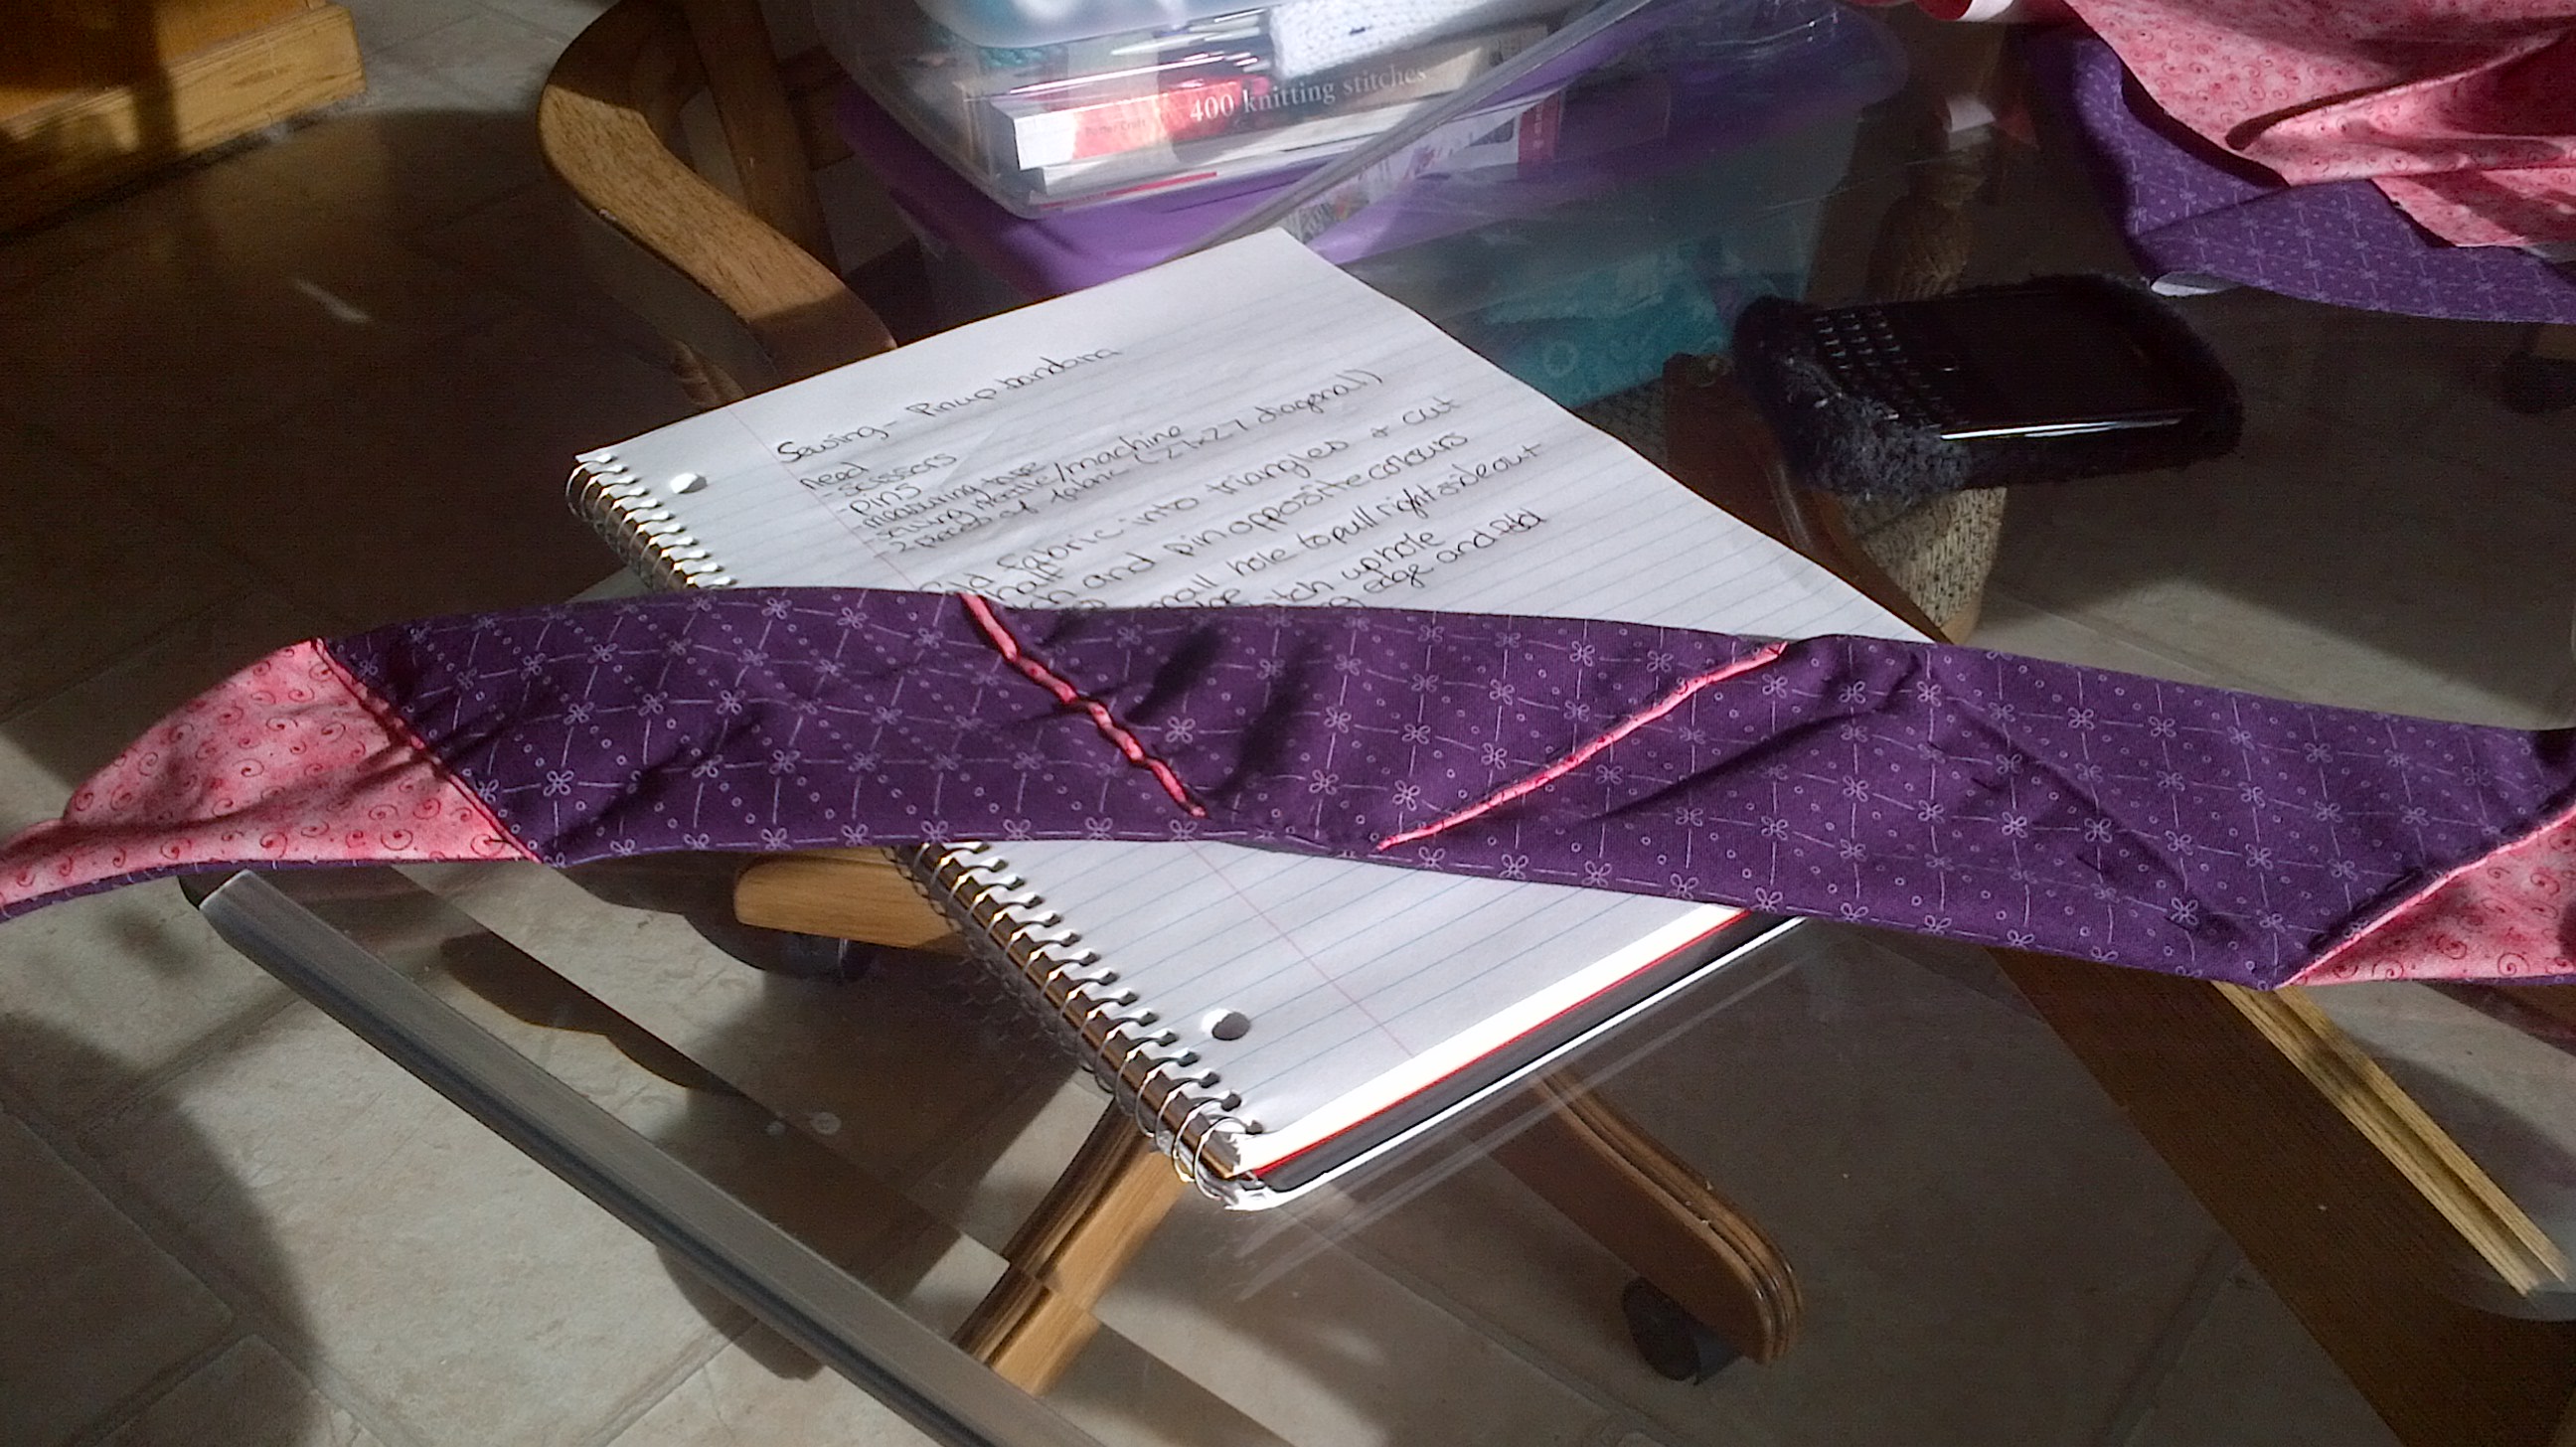
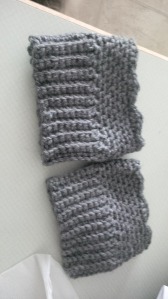
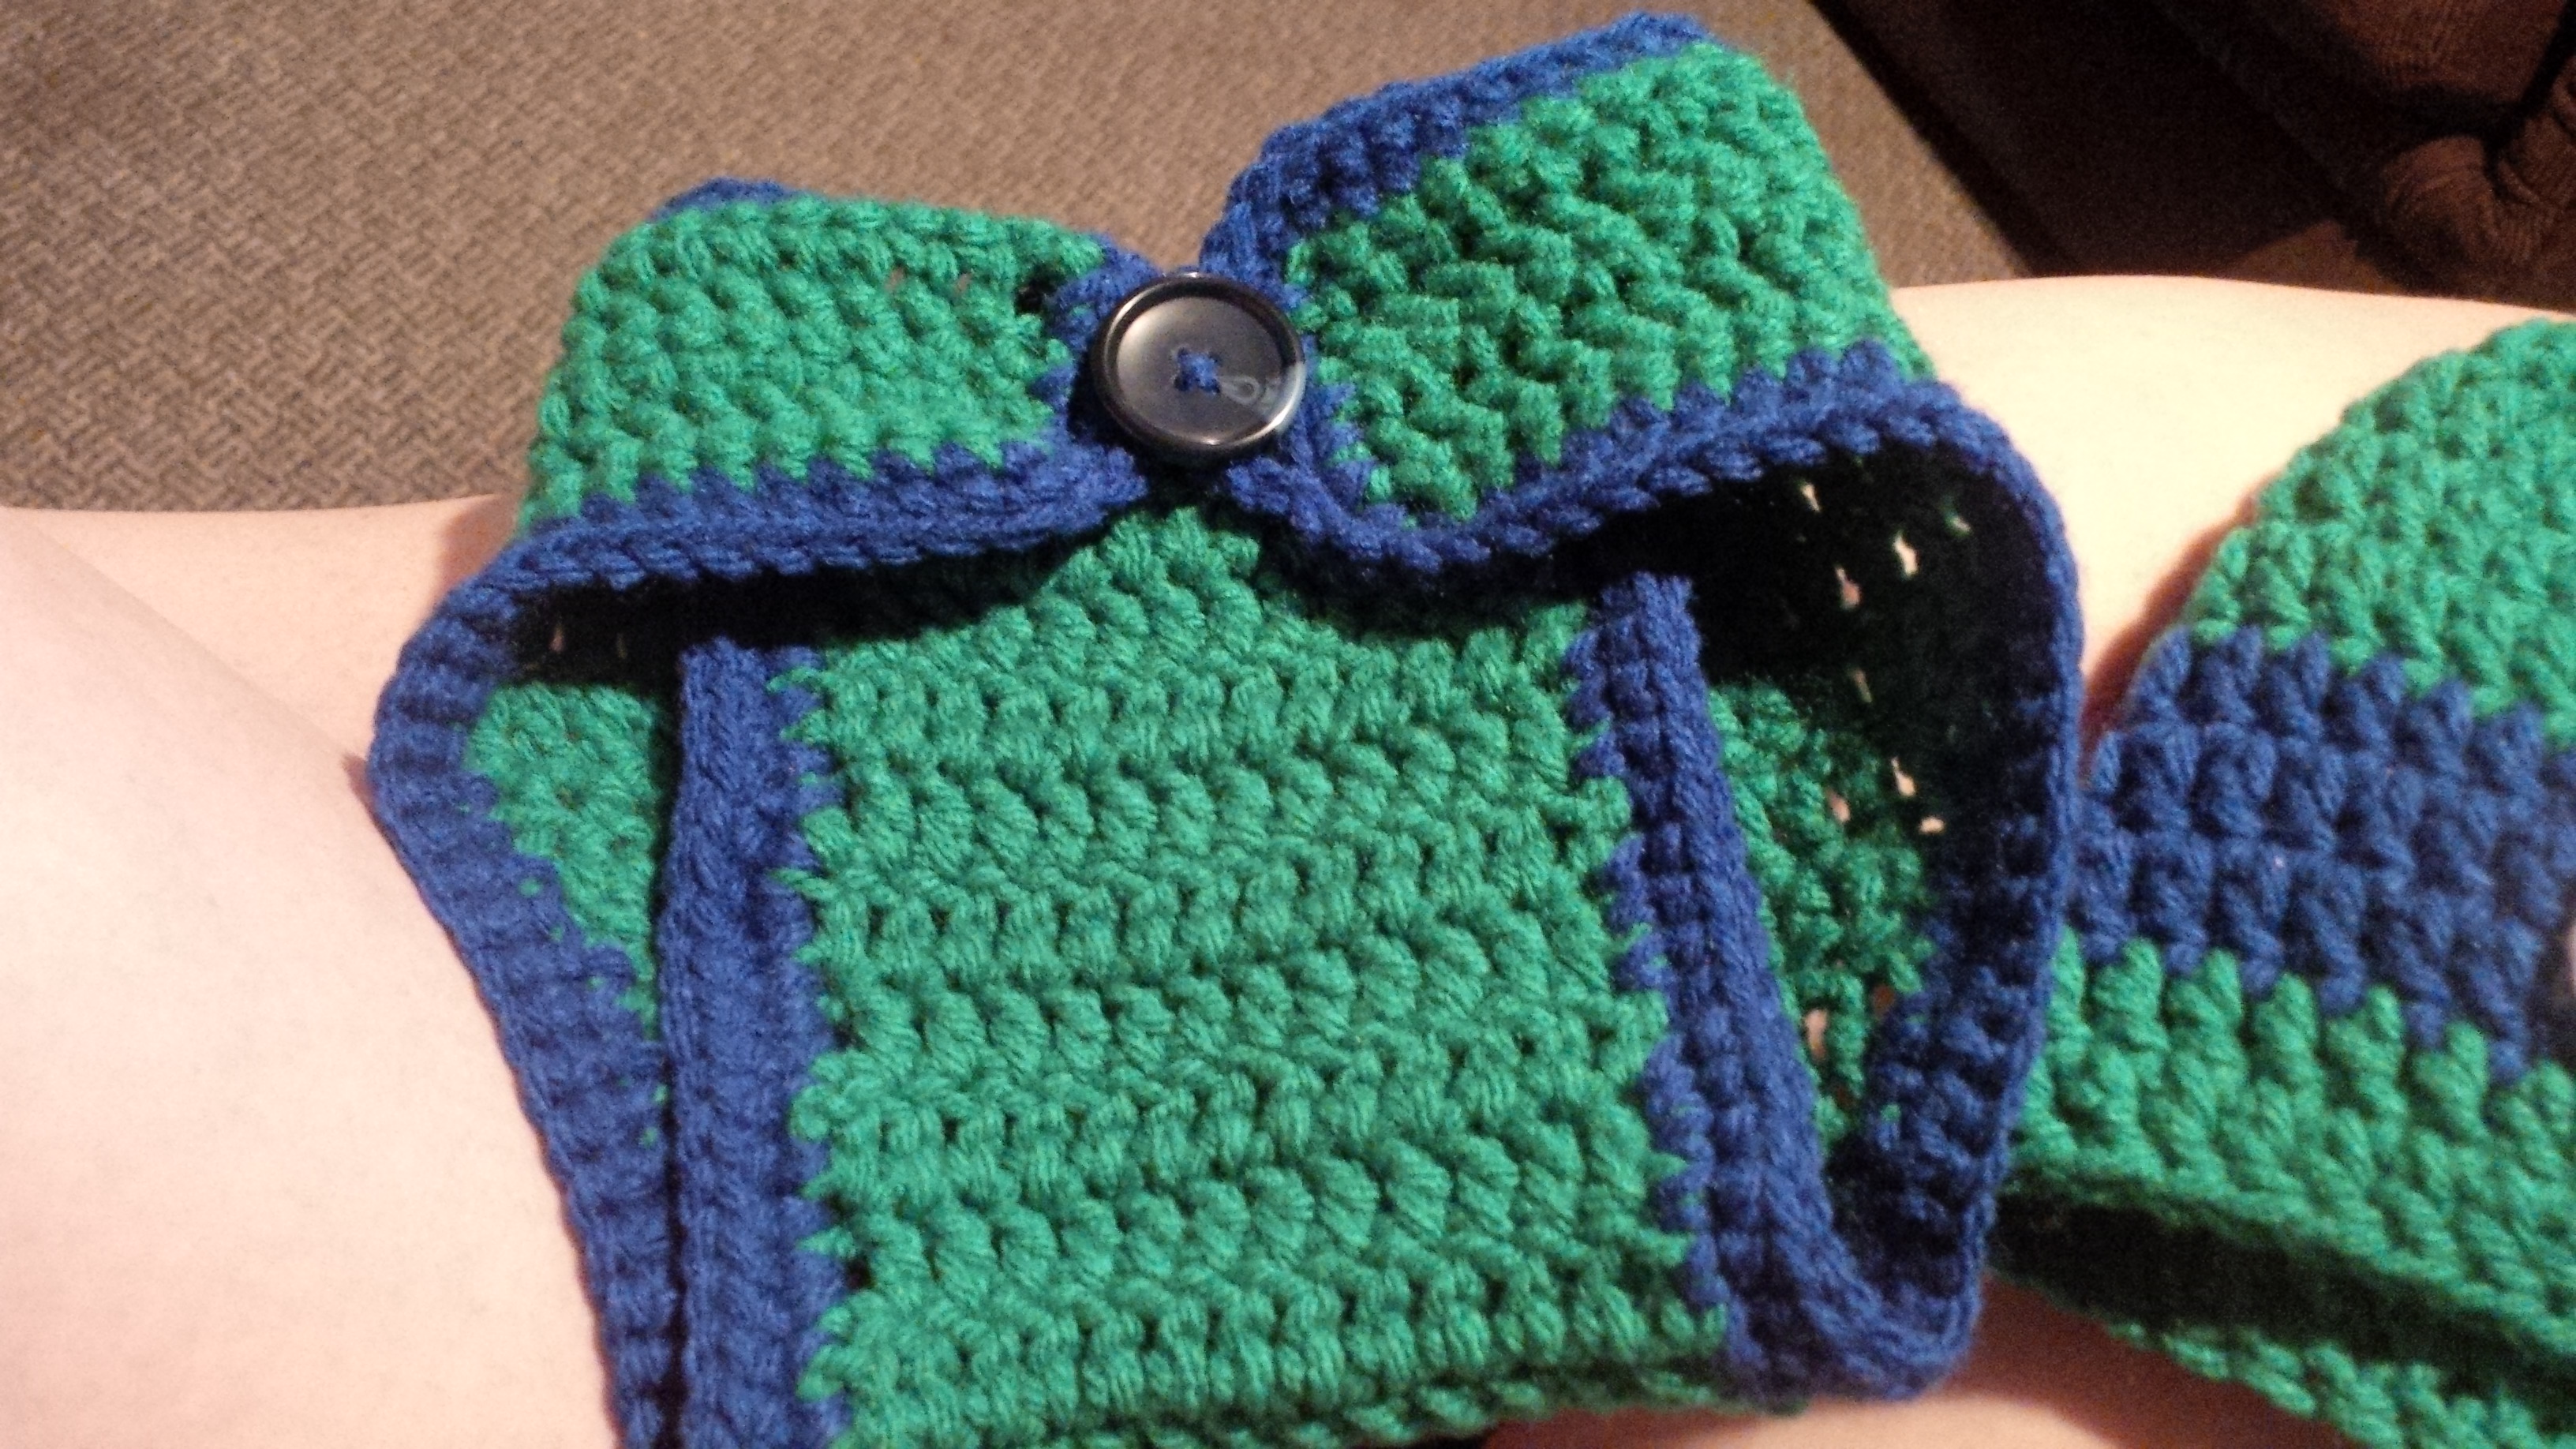
My sister-in-law also requested some boot cuffs, so I got to be creative. The crocodile ones were made to totally match baby’s booties. The second pair were a v-stitch top, and ended up not being very stretchy. Here is the pattern I used to do the bottom, I then changed up the top part.

crocodile cuffsboot cuffs

I cleaned up my pinterest not too long ago, and seems like I got rid of the pin with the pattern for this hat. Isn’t it adorable? It is a pretty easy newsboy hat. The band on the front could be longer, but it is still adorable.

Newsboy cap

The volleyball snuggly is for nephew to be. His parents play beach volleyball all summer and he will likely be spending a lot of time at their games. I thought he needed a volleyball of his own. The pattern for the ball is here. The blanket is just a granny square, with a sc,hdc, dc, dc, hdc, sc edging. Super easy and fun.

volleyball snuggly

This is another one I’ve lost the pattern for. It is also for nephew to be. My mom used to make us ninja turtle pizza when we were little. (It is a pb and jam pizza on a homemade crust, and I’m so glad my niece and nephew like it because it gives mom and excuse to make it and us an excuse to eat it). So I figured her grandson needed a ninja turtle diaper cover and hat. For the hat, this is the pattern I used for the ties, but the hat pattern looks pretty great too – I think I might try it next time.

ninja turtle diaper cover Ninja turtle hat

This is another diaper cover. I decided to make after going to a craft sale and seeing all the tutus. I made a simple crochet diaper cover then tied in sections of tulle to it.

tutu diaper cover

This buttoned hat started as a headband (pattern here), then I decided it wasn’t complete and continued the pattern all the way into a hat.

sparkly button hat

Leave a comment »

Dabbling in arm knitting

arm knit blanketOn pinterest, I saw a few pins showing arm knitting. This intrigued me, so I thought I would give it a try.

I made a nice throw blanket. It is a little holey, but cute. Plus it only took 3balls of yarn and less then an hour to make.

Leave a comment »

Card Wallet

imageWhen I made my cell phone wallet, I had room for a few cards and bills. But because I’m a girl, and I love discount and points cards, I have a LOT of cards and needed a card wallet.
So I Googled some inspiration and found a couple options I liked. See here.
I used a H/5.00mm hook and chained 19 stitches. SC into second chain from hook, I SC across. After 6 rows of sc, I did a row of 1hdc 1ch across. imageThis pattern repeated 4 times and finished with 6 rows of sc.
I lined the interior and attached clips. Then I chained 14 and did 5 rows of hdc.
Let me know what you think.


Leave a comment »

Knitting Needle Case

It always surprises me what posts are popular. One of my most popular posts was the Crochet Hook Case, not expected, but awesome. So, I thought I would share my knitting needle case too. After some time with my friend Google Images, I found a couple options I liked (see one and two). I also saw this case that had a cabled bands to hold the long hooks. LOVED it.
After seeing all of these options, I knew what I wanted:
SAM_30741. All in one case
2. Cabled band at top for long straight needles
3. Lots of pockets
4. Ability to roll caseSAM_3075
5. Edging like Crochet Case
6. Fabrics to match Crochet Case

I measured and cut the pieces to the sizes needed. Then I secured the middle pocket to the big pocket. Next securing the top part of the middle pocket. The front pocket was added. The front and middle pocket had dividers, with half of the middle pocket lining up with the front pocket. That made the sewing a little easier, as I sewed those pockets at the same time. I then attached all three pockets to the interior fabric. Next, I attached the outer fabric to the already assembled project.
SAM_3076Once that was assembled, I once again followed weeks 3 & 4 (without the chocolate) of the You Go Girl instructions to do the crochet edging. Because I planned to secure it with a button, I needed to make a button hole. By Slip Stitching into each stitch of the edging. when I was on the side edge, and at the middle shell, I chained four instead of slip stitching into this shell. I then slip stitched into the sc stitch and continued SlSt around the case. I also wanted a button at the top, hoping it would prevent the needles from falling out.
And again I forgot to attach the buttons to the case before assembling it all.

Leave a comment »

Pin Up Bandana

Pin up styles are so awesome, and the bandana is such an easy way to put your hair up. It is so versatile, and can be worn casual, classy, or even dressed up depending on the material and outfit. I was looking for instructions on how to make your own bandana, so I could make some out of fun fabrics. After not being able to find instructions on how to make one, I found some tutorials on how to fold a bandana and style your hair. Reference 1 here and reference 2. Here is how I made mine. I wanted something I could just tie and go.

Materials needed: pins, pin cushion, sewing needle, scissors, two fabric swatches (27" diagonal, measuring tape

Materials needed: pins, pin cushion, sewing needle, scissors, two fabric swatches (27″ diagonal, measuring tape

Fold fabric in half (on the diagonal) and cut into triangles (will end up with 2 of each colour)

Fold fabric in half (on the diagonal) and cut into triangles (will end up with 2 of each colour)

Pin 1 piece of each fabric together and sew inside out. Flip right side out through a hole on the long edge. Sew up hole

Pin 1 piece of each fabric together and sew inside out. Flip right side out through a hole on the long edge. Sew up hole

Measure 3" from long edge. Start folding material.

Measure 3″ from long edge. Start folding material.

Pin along edges and sew the folded edges.

Pin along edges and sew the folded edges.

The finished product

The finished product

Final product on

Final product on


Because of the way it is folded, when you make the second one with these colours your can fold the opposite direction and you have a different one.

Leave a comment »

Crochet Hook Case

A look at the case when open

A look at the case when open

I seem to be a sucker for punishment when it comes to crafts. It is a very good thing I’m not a perfectionist, otherwise I would have issues. While googling craft ideas, I thought about cases for my knitting needles and crochet hooks. Then I came across this case. It looked to be within my sewing skill level. Since, I don’t like to follow patterns to the tee, because that seems a little boring, I added my own twists and sewed it by hand – BAD idea. My shoulders were so stiff from being bent over the project. I also added crochet edging that I found here, as part of a pillowcase pattern, which I am definitely planning on doing soon. Fabric Used

Anyways, I found really cute fabric to do this project, and got enough to do a knitting needle case, a sewing kit and a pin cushion. I LOVE this fabric. It was from Walmart in one of those pre-cut packages that came with 4 different patterns. I picked up 2.

A look at the crochet edge

A look at the crochet edge

For this project, I needed 3 patterns, a zipper, thread that worked with the patterns, a button, and yarn. You can follow the directions of the original pattern I based mine off of (link is above). I pinned and attached both pockets and zipper, then started attaching the back. Once the case was assembled, I followed weeks 3 & 4 (and ate the chocolate) of the You Go Girl instructions to do the crochet edging. Because I planned to secure it with a button, I needed to make a button hole. By Slip Stitching into each stitch of the edging. when I was on the bottom edge, and at the middle shell, I chained four instead of slip stitching into this shell. I then slip stitched into the sc stitch and continued SlSt around the case.
The pocket for the hooks

The pocket for the hooks

The Case, all closed up

The Case, all closed up


I should have sewed the button on before attaching the backing, but didn’t think about it until I was starting the edging. Ooops. That has led to a creative thinking on how to add the button. To place the button, I folded placed crochet needles in the middle pocket and folded the case together. I placed the button where the button hole would be pulled a little when secured.
A look inside the zippered pocket

A look inside the zippered pocket

1 Comment »

Tutu Bedskirt

My sister found directions for a Tutu Bedskirt a couple months ago and sent it to me. I fell in love immediately and HAD to make one for my niece for Christmas. You can find the original here. I am not one for sewing, but am determined to learn, so since it was a “no sew” project, it seemed in my skill level.
Close up
The original was made for a single bed, and my niece has a queen – we’re all jealous, so I went to the fabric store and picked up tulle. Because I like to be different, I purchased 3 colours – purple, green and pink. The project only ended up needing about 21 yards of tulle.
Once I started the project, it took about 4 hours to complete, and since I was on the rec room floor hunched over for most of that 4 hours, I was a little stiff the next day.
I started by pinning the sides of the fitted sheet together – that way there were the same number of slits on each side. I then cut slits two finger widths apart down the sides, and on one end.
Next, I cut the tulle into 4-5″ lengths. To make the tutu fuller, I combined a strip of each colour into each set of slits. To secure in the slits, fold the tulle in half and thread through the top slit then the bottom, so the loop is in front of the tulle hanging down. From experience, it looks better and hangs a little better then having the loop behind.

IMG00523-20121201-1641

IMG00524-20121201-1641

2 Comments »